Launch Visual Studio Checkin Window With A Keystroke
A few weeks ago I blogged about how you can get custom TFS checkin policies to work when committing from the command line. In that post, I had a quick aside about how you can launch the checkin window (i.e. pending changes) with a quick keystroke using AutoHotkey. I realize that many people don’t use AutoHotkey (although you really should; it can save you a lot of time), so I thought I would show how you can accomplish this task without AutoHotkey. It’s quite simple really, and it allows you to launch the VS Checkin window from anywhere, even if you don’t have Visual Studio open.
Steps To Launch VS Checkin Window From The Visual Studio Command Prompt
- Open the Visual Studio Command Prompt. To do this, just hit the windows key and type
Developer Command Prompt For VS2012if using VS 2012, orVisual Studio Command Prompt (2010)if using VS 2010. - In the VS Command Prompt, change to a directory that is in your TFS workspace mapping. e.g.
cd C:\Dev\TFS - Type
tf checkinand hit enter.
Steps To Launch VS Checkin Window With A Shortcut Key
- Right click on your desktop and choose New –> Shortcut to create a new shortcut file.
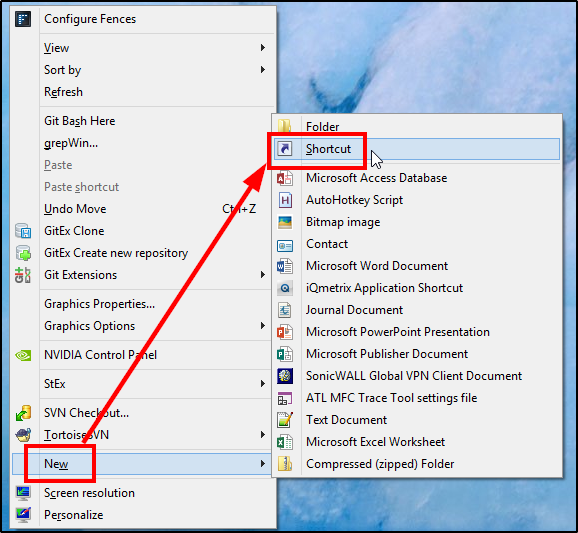
-
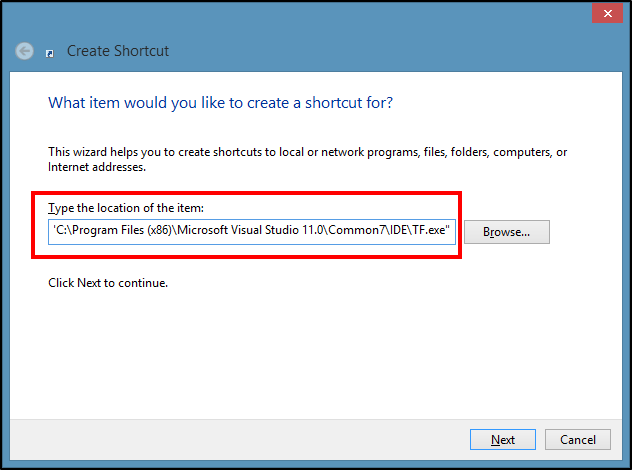
Have the shortcut point to the TF executable. This can be found at “C:\Program Files (x86)\Microsoft Visual Studio 11.0\Common7\IDE\TF.exe”.
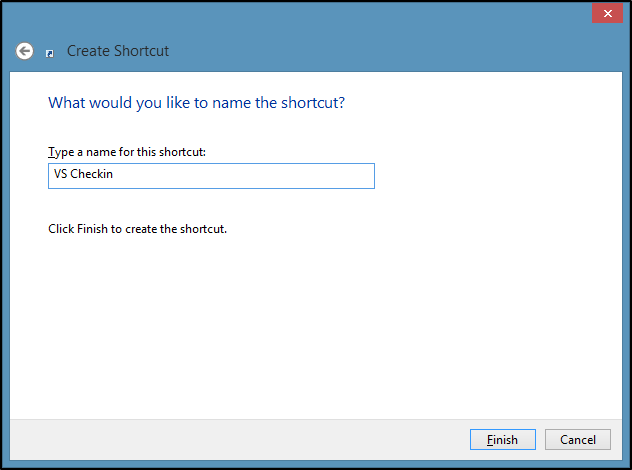
- Enter the name for your shortcut file, such as VS Checkin.
- Now that the shortcut has been created on your desktop, right-click on it and go the the properties (or use alt+enter). You will want to:
- add
checkinto the very end of the Target, - change the Start In directory to a directory you have mapped in your TFS workspace,
- and assign it a Shortcut Key.
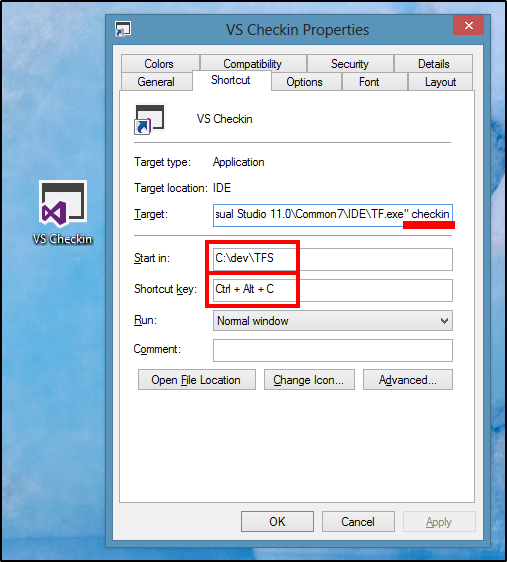
- add
Results
That’s it. Go ahead and try your shortcut key. I’ll wait. You should see something like this:
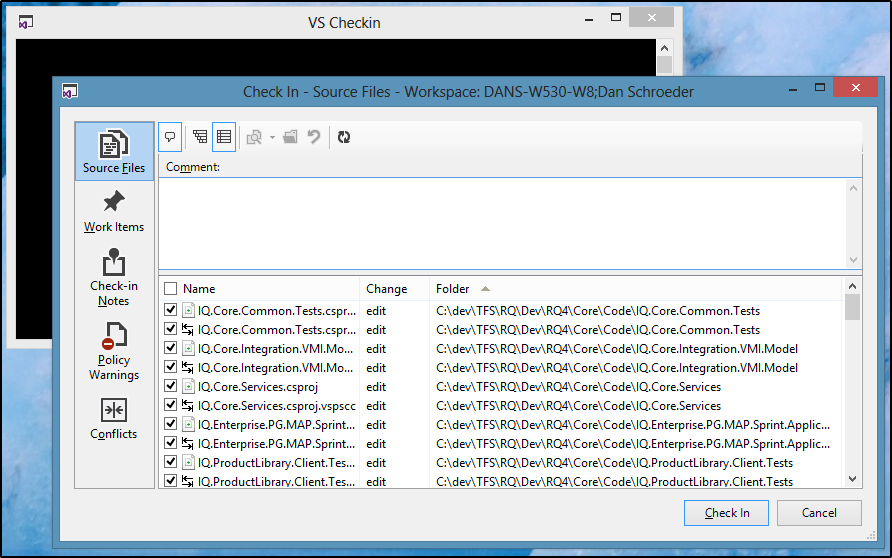
Notice that it pops both a command prompt window and the actual checkin window. If you don’t have any pending changes, then the command prompt window will simply open and close.
More Information and Caveats
Old Style Checkin Window
You probably noticed in the screenshot above that even though I’m using Visual Studio 2012, it still pops the old VS 2010 style of checkin window. I actually prefer this popped out window to the VS 2012 pending changes pane, and I know a lot of people agree.
Getting The Shortcut Off Your Desktop
Above I had you create the shortcut on your desktop, but you might not want to have it clutter up your desktop. Unfortunately if you move it to some other folder you will find that the shortcut key no longer works. For some reason I have found that for the shortcut key to work the shortcut file must either be on your desktop, or in the Start Menu. If you are using Windows 7 you can simply drag and drop the shortcut into the Programs section of the Start Menu. For us Windows 8.0 folks the Start Menu is gone, so just manually move the shortcut to “C:\ProgramData\Microsoft\Windows\Start Menu\Programs”.
You may find that after moving the shortcut file the shortcut key no longer works. You just have to go back into the Shortcut file properties, assign it a new Shortcut Key, hit Apply, and then assign the original Shortcut Key back.
Shelving Changes In TFS Using The Old Style Shelve Window
If you are using TFS and want to shelve your changes instead of checking them in, you can access the old Shelve Pending Changes window in the same way. In step 4 above, instead of adding checkin as the TF.exe argument, add shelve. To launch it from the Visual Studio Command Prompt, type tf shelve instead of tf checkin.
Getting Custom TFS Checkin Policies To Work
As you may have guessed from the very start of the article, custom TFS checkin policies don’t run in this checkin window by default; they will throw errors. Fortunately for you I have already created a registry file that you can run after each checkin policy update that you do which will rectify this problem.
I hope this helps you be more productive. Happy coding!

Leave a Comment
Your email address will not be published. Required fields are marked *