
Update your terminal prompt and font in Windows Terminal, VS Code, and Visual Studio
I use Oh My Posh to improve my PowerShell terminal’s prompt appearance and show additional helpful information. There are many themes to choose from, and I have even created my own theme that you are welcome to use. Mine looks like this:

You can see it displays additional helpful information, like the current directory, the current git branch and status, how long it took the last command to complete, and more.
To use a terminal prompt theme you need to have a font installed that supports all the icons that the theme uses, and then configure your terminal to use that font.
Even if you do not want to use a prompt theme, you may still want to update your terminal font, so let’s see how to do that.
Download and install a font
The first step is to install a font that supports all the icons you want to use.
You can head over to https://www.nerdfonts.com/font-downloads and find a font that you like and supports the icons you want.
I personally like the CaskaydiaCove Nerd Font.
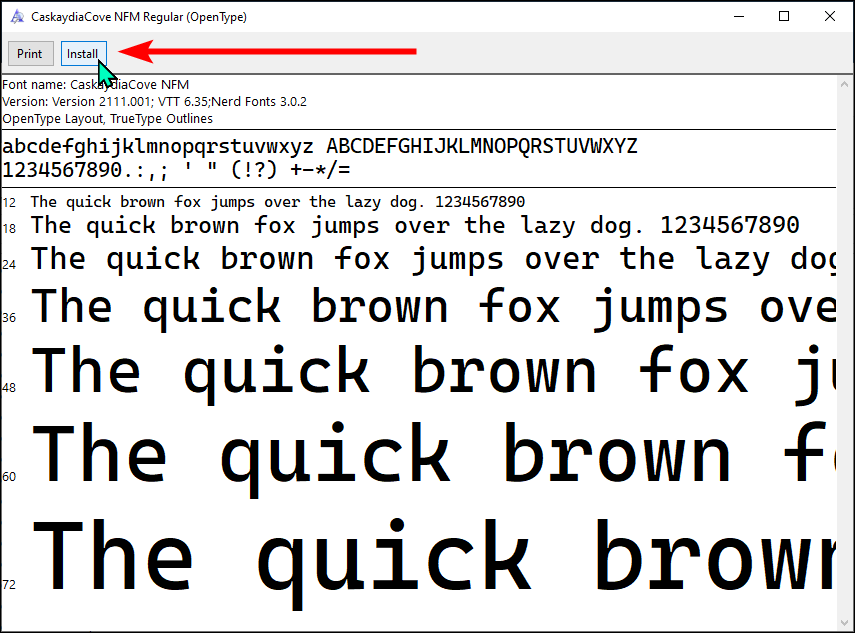
Once you’ve downloaded and unzipped the font, you can double-click the appropriate .ttf file to open it in the Windows Font Viewer, and then click the Install button to install it.
Here is a screenshot of installing the CaskaydiaCoveNerdFontMono-Regular.ttf file font:
You can install several fonts if you like so that you have a few to choose from in your applications.
If you want to install many fonts at once, you can select multiple .ttf files and then right-click and select Install from the context menu.
I personally like Mono fonts for my code and terminal, as I find them easier to read and better for aligning code.
Mono fonts use the same width for all characters (e.g. the i character will take the same amount of space as the w character).
I will be configuring my terminal to use the CaskaydiaCove Nerd Font Mono font in the examples below.
Update Windows Terminal to use the new font
To update the Windows Terminal font:
- Open Windows Terminal.
- Open the Settings via the tab dropdown menu, or by pressing Ctrl+,.
- (Optional) I recommend setting the
Default terminal applicationto Windows Terminal. This will make it so that when Windows launches a terminal app, such ascmd,Windows PowerShell,PowerShell 7, or the Visual Studio debugging console, it will launch in Windows Terminal instead of their default (old-style) console.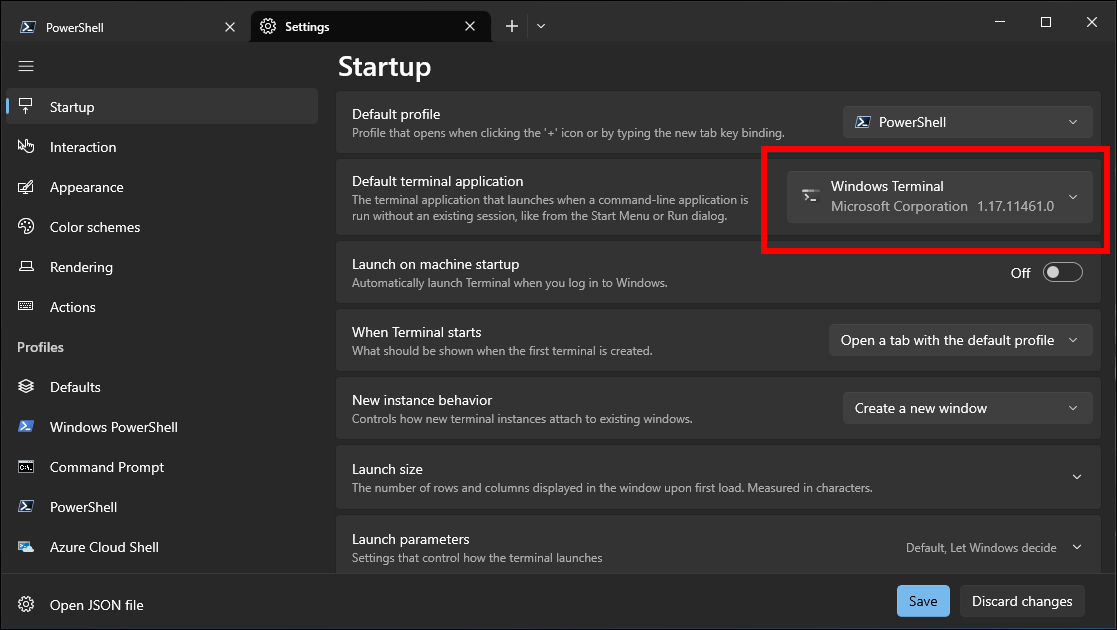
- Select the profile that you want to change the font for.
If you want to change the default font for all profiles, then select the
Defaultsprofile. - Click into the
Appearancesection.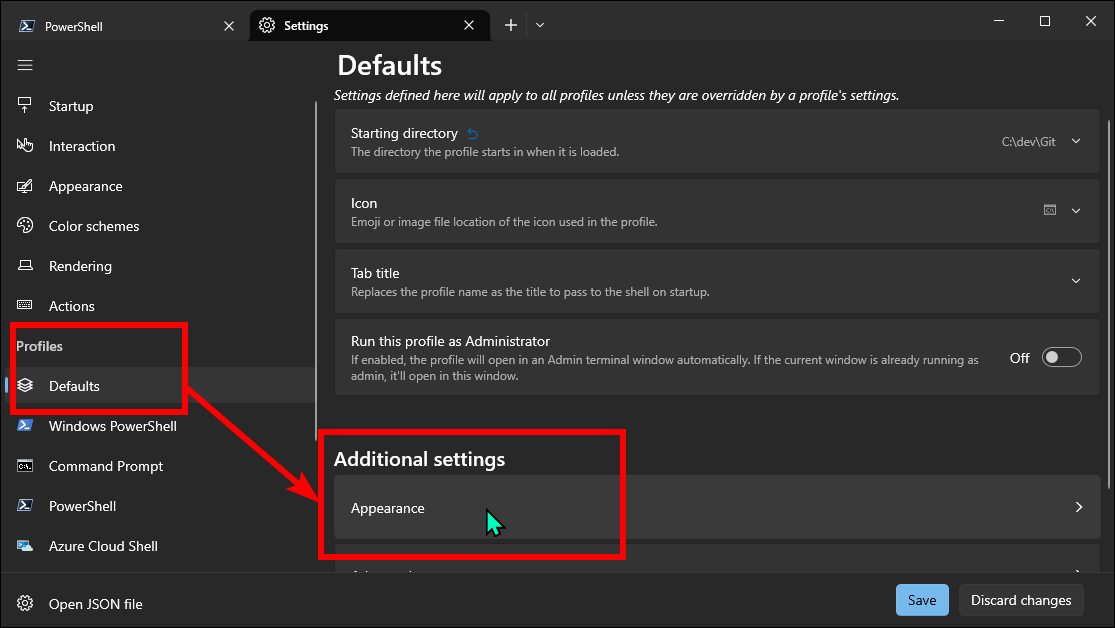
- Change the
Font faceto the font you want to use.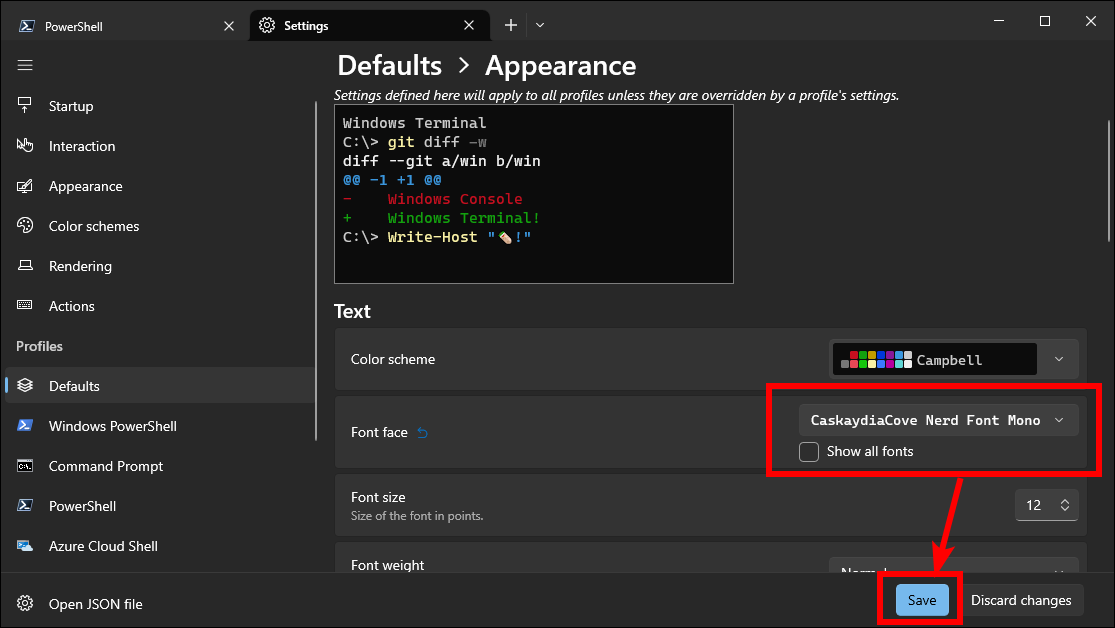
- Save the changes.
- Repeat for any other profiles you want to change the font for.
Windows terminal should now be using your new font 🙌.
Update the VS Code terminal to use the new font
To update the VS Code terminal font:
- Open Visual Studio Code.
- Navigate to
File->Preferences->Settings, or press Ctrl+, to open the Settings window. - Search for
font family. - You will likely notice the
Editor: Font Familysetting near the top. You can change this if you like, but it will change the code editor font, not the terminal font.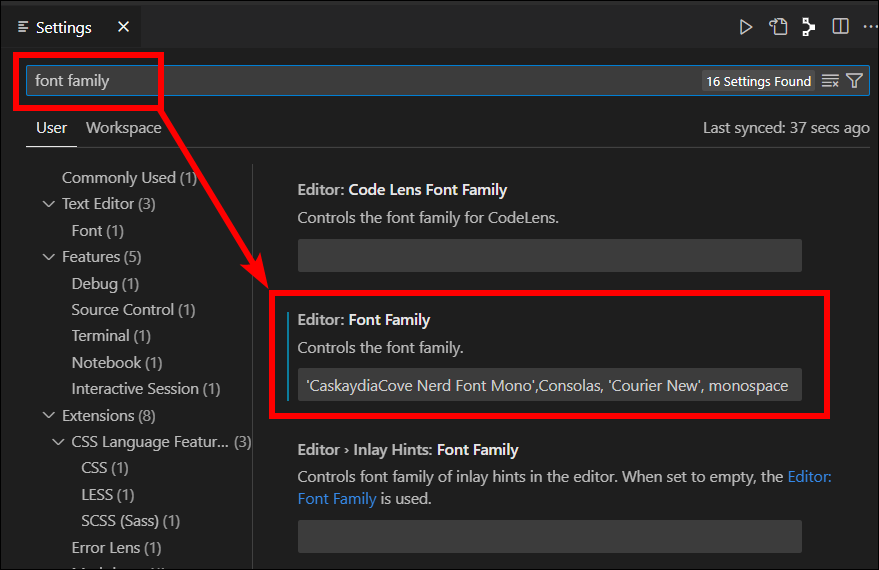
- Scroll down to the
Terminal > Integrated: Font Familysetting, and update it to the font you want to use.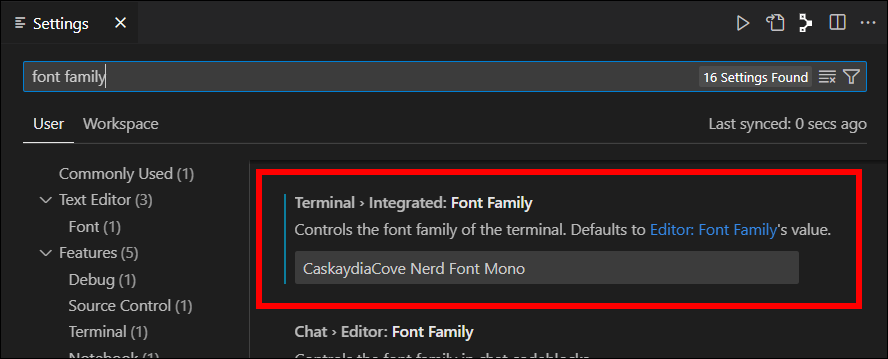
- Save the changes.
The VS Code terminal should now be using your new font 🙌.
Update the Visual Studio terminal to use the new font
To update the Visual Studio terminal font:
- Open Visual Studio.
- Navigate to
Tools->Optionsto open the Options window. - Navigate to the
Environment->Fonts and Colorssection. - By default it will be on the
Text Editorsetting. You can change the font for these items if you like, but it will change the code editor font, not the terminal font. - Change the setting to
Terminal. - Update the
Fontsetting to the font you want to use.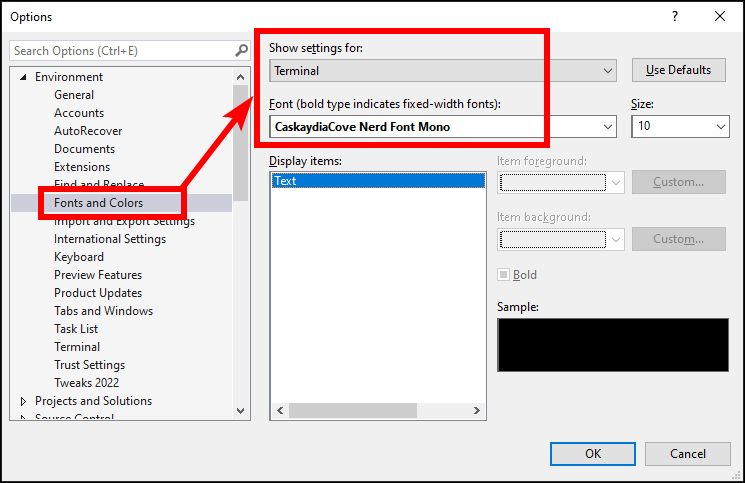
- Click the OK button to save the changes.
The Visual Studio terminal should now be using your new font 🙌.
Conclusion
You now know about Oh My Posh, terminal prompt themes, and how to update the fonts in Windows Terminal, VS Code, and Visual Studio. I hope you found this post helpful.
Happy coding!
Comments
nils
Cool. I’ve been using Oh My Posh for a long time, is great. I’ll certainly check your custom theme. I recommend the font Iosevka to save horizontal space. It was also packed as a nerd font.
Leave a Comment
Your email address will not be published. Required fields are marked *